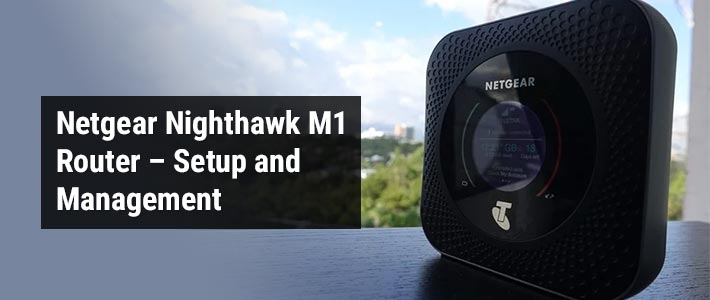
Netgear Nighthawk M1 Router – Setup and Management

Netgear is known for launching amazing products. Lately, taking care of people who often spend most of their time outside the town, Netgear launched its mobile hotspot routers. It means one can access the internet with the help of a portable hotspot WiFi router. One such product in line that facilitates WiFi access outdoors is Netgear Nighthawk M1 4G LTE mobile router. However, you will need a SIM card to make it functional. But, is that enough? Check out the information given below to know more.
About Netgear Nighthawk M1 4G Mobile Router
Before you learn about the setup process of your router, you must familiarize yourself with it. It has already been told that Nighthawk M1 is a mobile WiFi router that allows the user to get connected to WiFi. It eliminates the need to turning the cellular hotspot on that consumes a lot of battery. Now, let’s have a look at the things that will receive inside the mobile router package:
- Your Nighthawk M1 mobile WiFi router and a rechargeable battery
- A quick start guide that sums up the steps to install the hotspot device
- Type-C USB cable and an AC power adapter to charge the router’s battery
Your Netgear Nighthawk M1 mobile router will have an LCD screen, a power button, and the Status LED to reveal the strength of the internet connection. Apart from this, the router has various ports to facilitate connections. Considering that now you are aware about what your hotspot router’s hardware may consist of, let us now shift our focus to the steps to carry out the router’ setup process.
How to Set Up Netgear Nighthawk M1 Mobile Router?
Here are the steps that will help you set up your mobile WiFi router in an easy way. However, before you give a shot at them, consider ensuring that your mobile router is off.
Step 1: Check SIM and Insert Battery
Remove the mobile router’s bottom cover by placing your thumb on the arrows and pressing down while sliding the cover. Now, see if there is a SIM card installed in the SIM slot. The SIM card is supposed to be micro. If no SIM card is there, consider sliding your micro SIM card into the slot with the same name. After that, align the battery connectors and insert the router’s battery. In case you have a micro SD card, insert it into the micro SD card slot.
Step 2: Download the Netgear Mobile App
Now, unlock your mobile phone and download the Netgear Mobile app. You need to download the app so that you can change your mobile hotspot router’s SSID and password. The app will also help you play and share media. Furthermore, the Travel Router feature can be enabled via the same app. Your mobile phone needs to be connected to a super-fast internet connection to download the app successfully. The app can be downloaded from the app store or via the netgear.com/mobileapps URL.
Step 3: Switch On the Router
The third step is to switch on the router. Therefore, you need to locate the Power button and keep it pressed for three seconds. To know the WiFi SSID and password of the router, you need to press and release the Power button instantly. You can toggle through the WiFi Netgear Nighthawk M1 router LCDs. In case your mobile router stays powered off, you are required to charge its battery as soon as possible. Once done, you need to power up the router and move to the next step.
Step 4: Connect Your Devices
Now, you need to enable the WiFi Utility on your computer or laptop and look for the available WiFi networks. Pressing and releasing the Power button on the router will reveal the SSID and password. Choose your router’s WiFi network on the WiFi-enabled device and enter the network key. Just in case you wish to use your Nighthawk mobile router as a gateway, you can consider connecting an Ethernet-enabled device to the router’s Ethernet port. The connection should be stable.
Step 5: Set Up the Router
Lastly, you need to load an internet browser on a computer connected to the M1 router’s network. Into the address bar, key in any of these addresses – 192.168.1.1 or m1login.net. Hit Enter to reach the sign-in screen of the router. After reaching there, enter the default password. You are suggested to change this password to complete the setup process. After that, follow the on-screen prompts.
Summing Up
That’s all about the setup and management process of the Netgear Nighthawk M1 mobile router. It is anticipated that you will be able to set up the device easily. Just in case you wish to manage advanced settings of the device, use the URL or IP or the Netgear mobile app. It will also help you upload files to the Nighthawk router.
Tags: login to nighthawk router, Netgear Nighthawk, Nighthawk router login